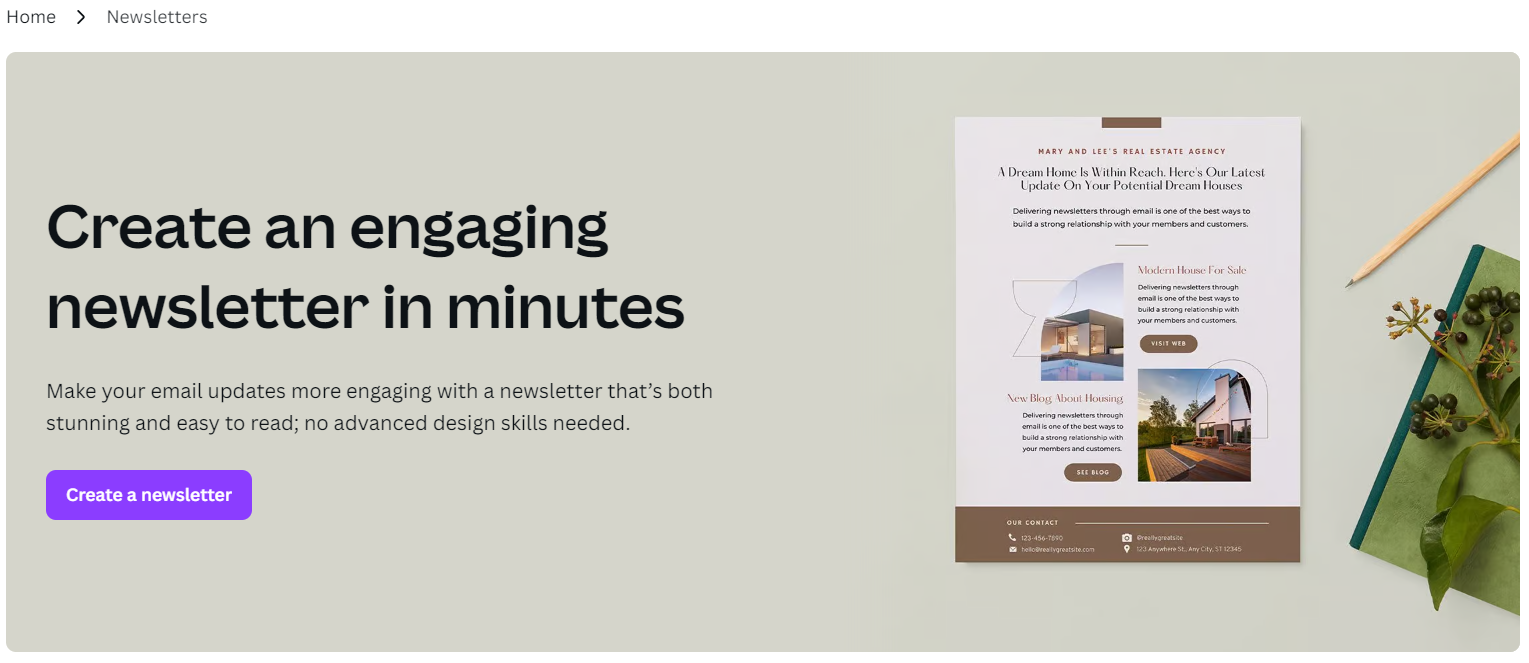
Canva is a popular design platform that provides you with easy drag-and-drop builders for brochures, cover pages, logos, posters, calendars and more. It now also gives you access to email newsletter templates that you can edit and send to your subscribers using email marketing software.
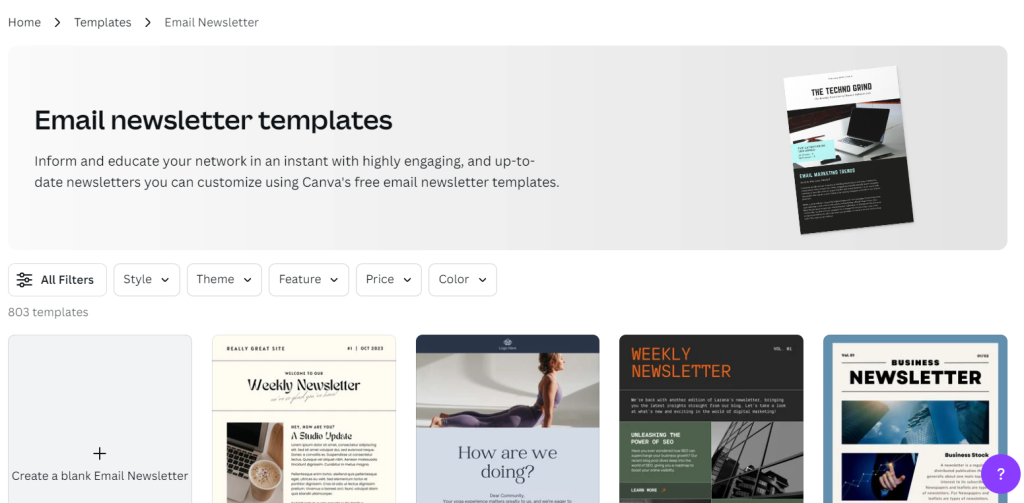
If you would like to learn how to create an email newsletter in Canva and embed it in your email, you are in the right place. In this article, we shall look at how to design your newsletter in Canva, download it, pick an email service provider, embed the Canva newsletter in your email, do some final checks and send it.
Now, to embed a Canva newsletter in an email, you can follow these steps below:
1. Design Your Newsletter in Canva:
- Create your newsletter design in Canva. You can pick a desired template and just edit it by adding your own content into the pre-made design. For illustration purposes, I picked the promotional email template below.
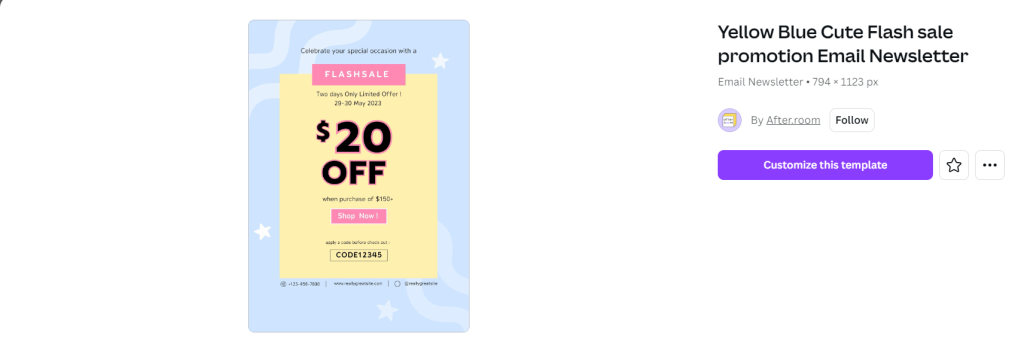
- I tweaked a few colours, added our website and changed the promotion dates.
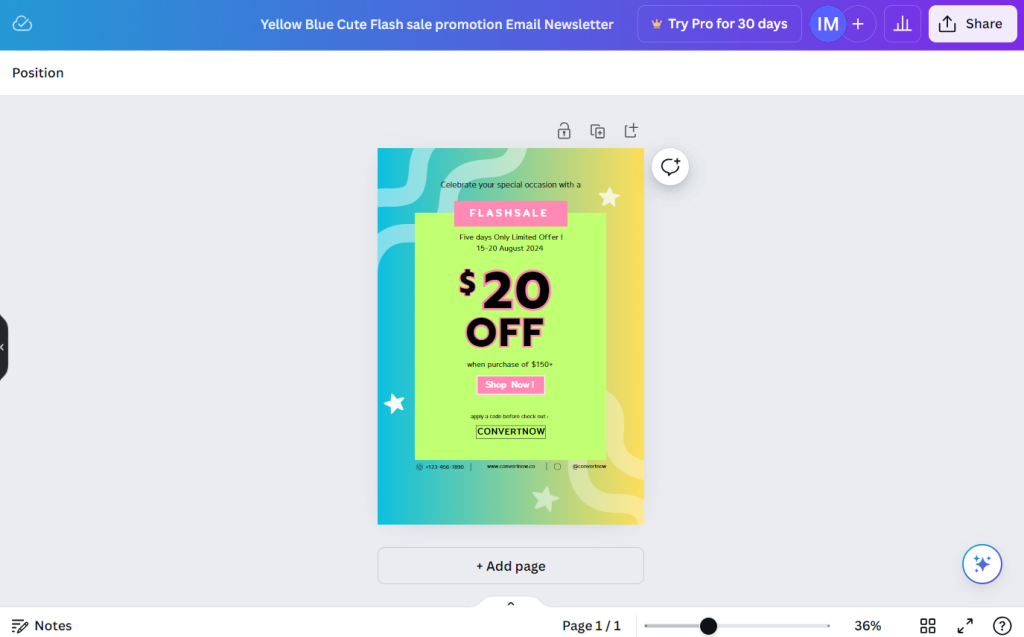
- Once done, click the “Share” button on the top right corner.
- Select “Download” and choose the file format (usually JPEG or PNG for images, or PDF if your email service supports it). I will go with JPG for now because our email service supports this or PNG formats.
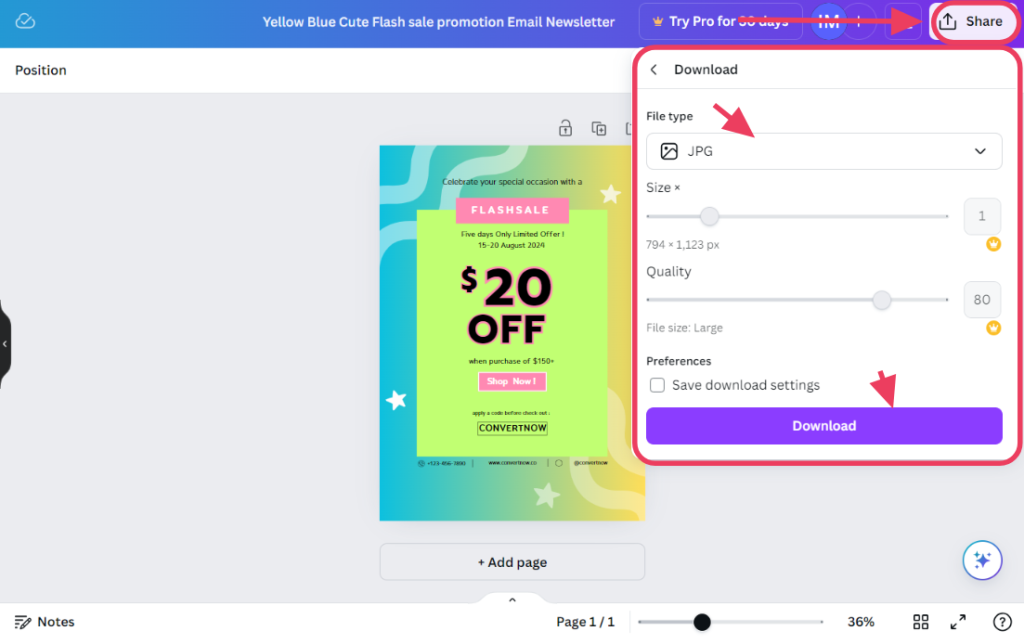
2. Download the Canva Newsletter:
- Download the newsletter to your computer by clicking on the download button pictured above.
3. Use an Email Service Provider (ESP):
- Log in to your email service provider (like Convertnow, Mailchimp, Brevo). I am using Convertnow – our very own affordable and versatile email marketing solution. ConvertNow provides you with a free email marketing plan that allows you to keep 3,000 email contacts and send 12,000 emails per month for free. Now log in or create a new account by selecting the free plan if you have less than 3,000 contacts or the paid plans if you have more.
4. Insert the Newsletter into Your Email:
- Once you log in, navigate to the campaigns section pictured below.
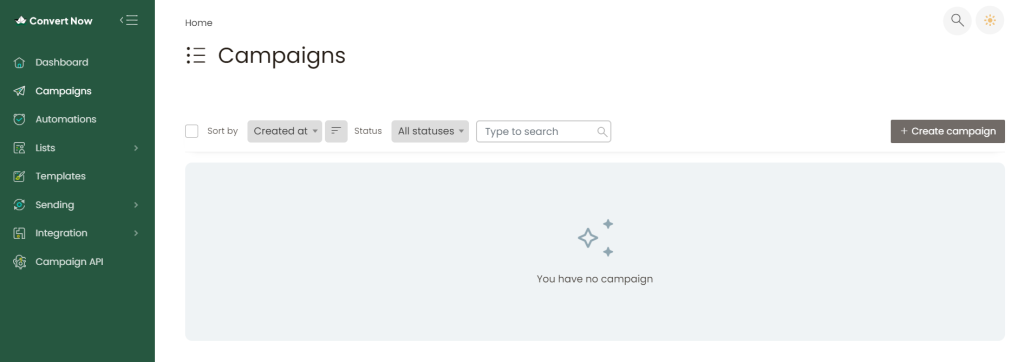
- Create a new email campaign and pick the regular campaign type which allows you to add images to the email.

- In the next section, pick the email list you would like to send to. If you don’t have a contact list, make sure your emails are saved in CSV format. Select “New list/segment” to upload and create a new contacts list. If you already have a list uploaded, choose it and click “Save & Next” to proceed.

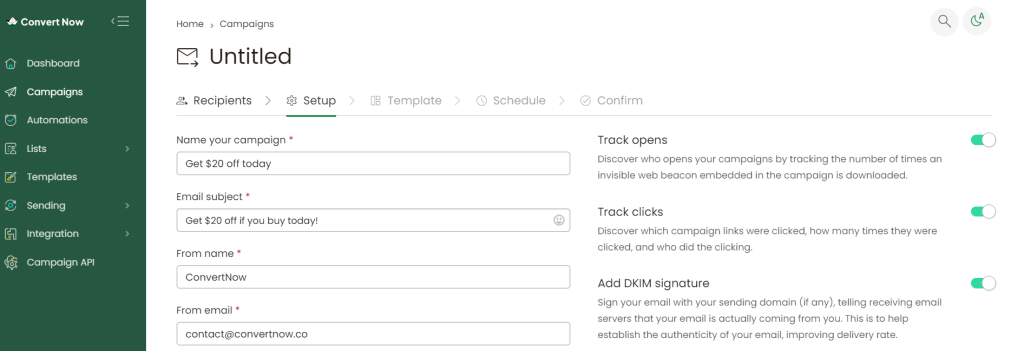
- In the setup section, fill in the name of the campaign, the Email subject line, from and to addresses, then click “Save & Next” to proceed.
- The email content section is next. Since we have an image downloaded from Canva ready to go, all we need is a template. In this section, choose “Create from an existing template” and proceed.
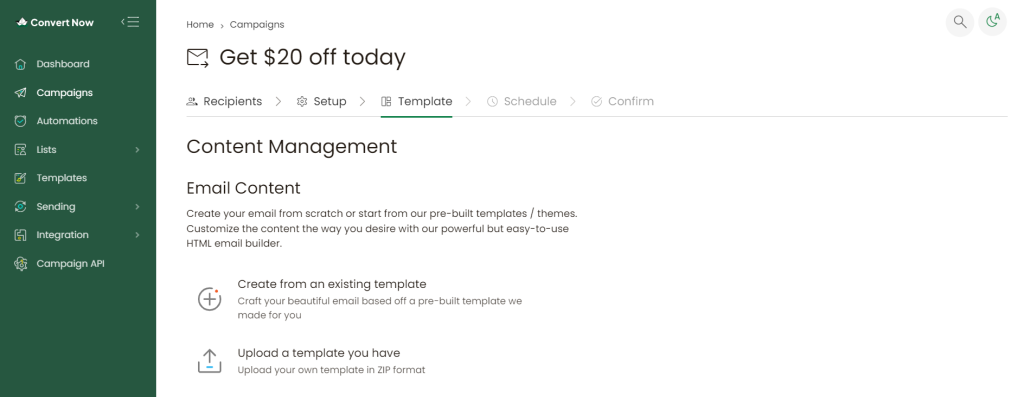
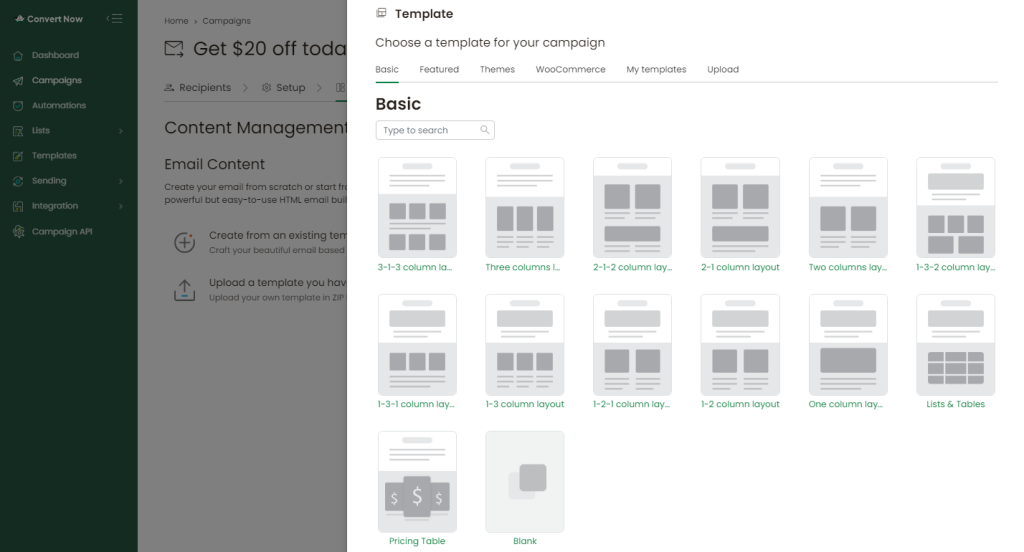
- This will bring you to the templates section. Since our email is already built in Canva, and we practically have the whole image with the required content, select the “blank” template to proceed.
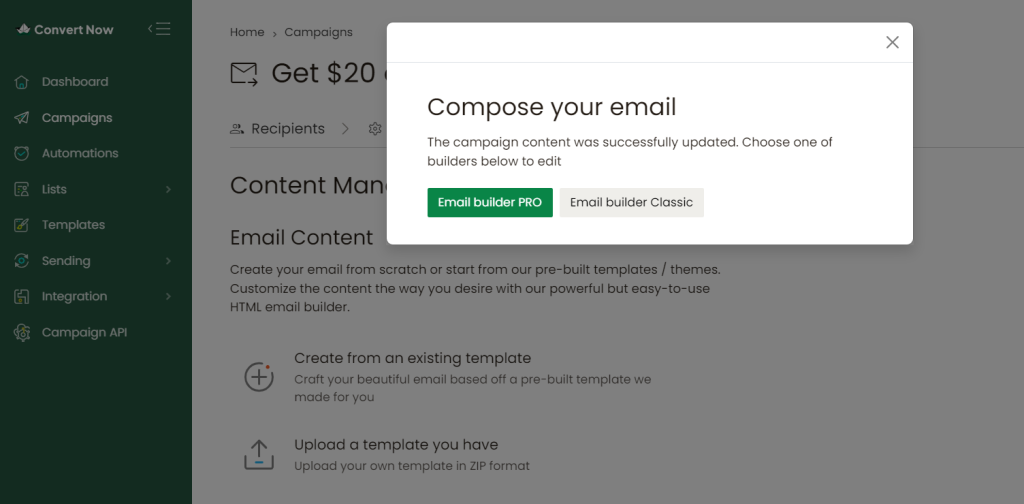
- Select “Email builder PRO” to get our pro editor for free.
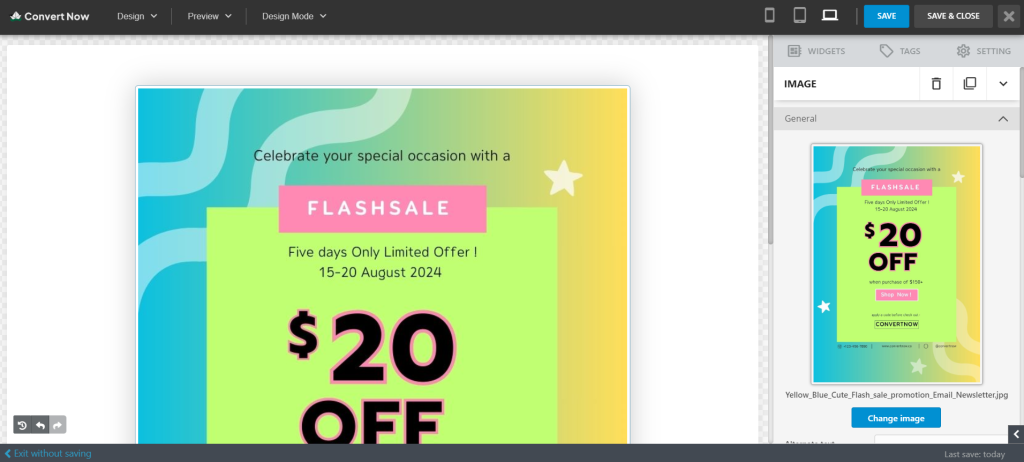
- In our email builder PRO you can build any kind of look you want your email to have thanks to all the widgets available. Select the “image” widget and drag-and-drop it to the editor.
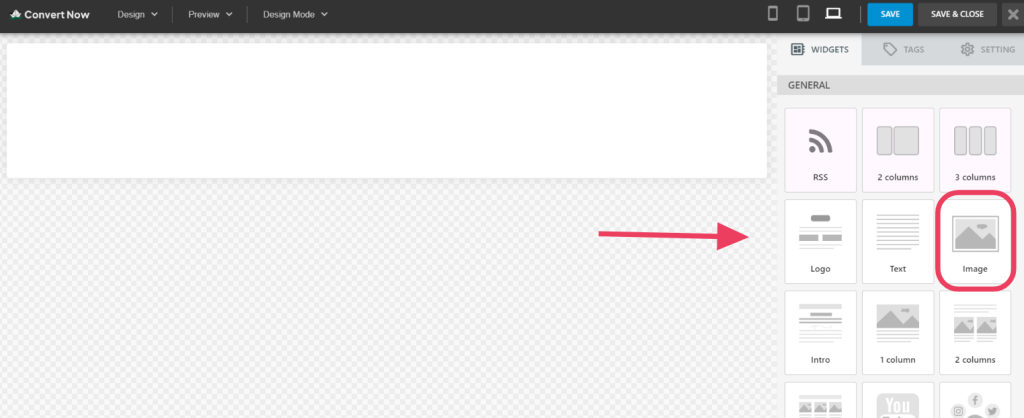
- You will now have activated the option to browse to upload an image. Browse and navigate to the folder where your Canva newsletter is saved in JPG or PNG formats. Then select the Canva image and upload. In a few seconds, it will now be in your email editor.
5. Add Links:
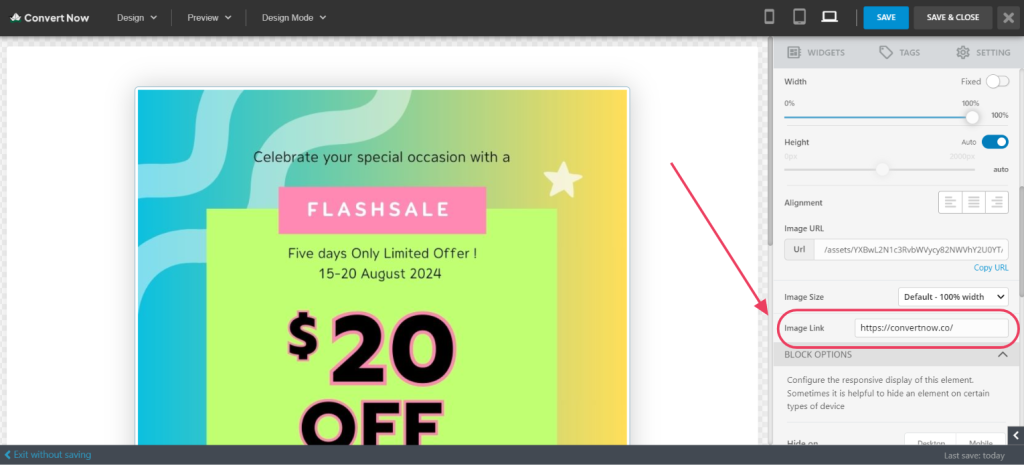
- If your newsletter includes links like ours will, make sure to hyperlink text or images within the email editor. In this case, we can link to our ConvertNow homepage as our landing page for the promotional offer.
- On ConvertNow platform, scroll down in the widget section and find “Image Link” then add your landing page link in there. Now click “Save & Close” to move to the next step.
6. Previewing your email:
- You should preview your email to ensure the newsletter looks good for various devices. On ConvertNow, you can preview the email on mobile, tablet and desktop devices by clicking the mobile, tablet and desktop icons pictured below.

7. Send or schedule the email:
- If you are happy with how your Canva Newsletter will look in all the devices, now you just need to send the email or schedule it to send later at your preferred time.

8. Confirm
- Now we just need to confirm if everything is okay. Countercheck the email list you picked, your subject line, and more. You can even send yourself a test email first in this section to preview how the email will look in your inbox like on Gmail, Yahoo, Outlook, Live, Yep and others.
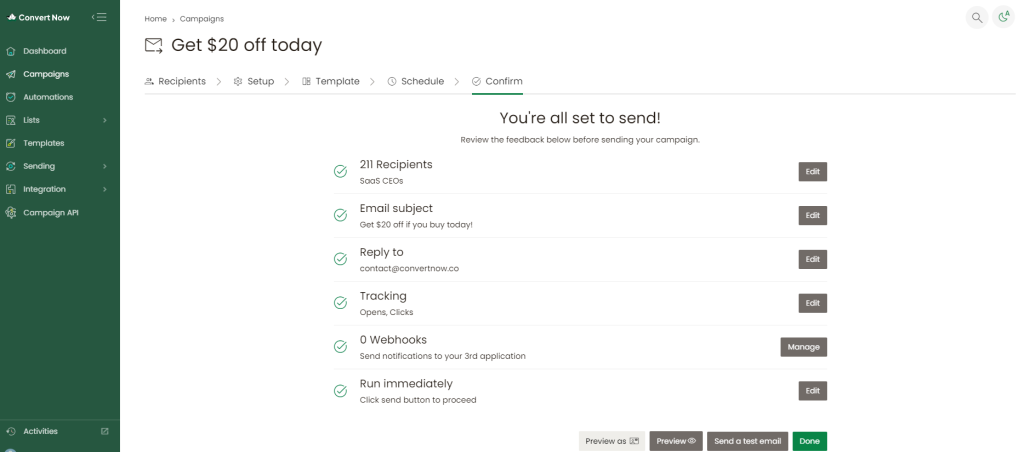
- Once satisfied, proceed to send the email to your recipients.
9. Track the email stats in ConvertNow:
- Once you send your Canva newsletter email campaign, ConvertNow provides you with a powerful tracker for reporting campaign performance.
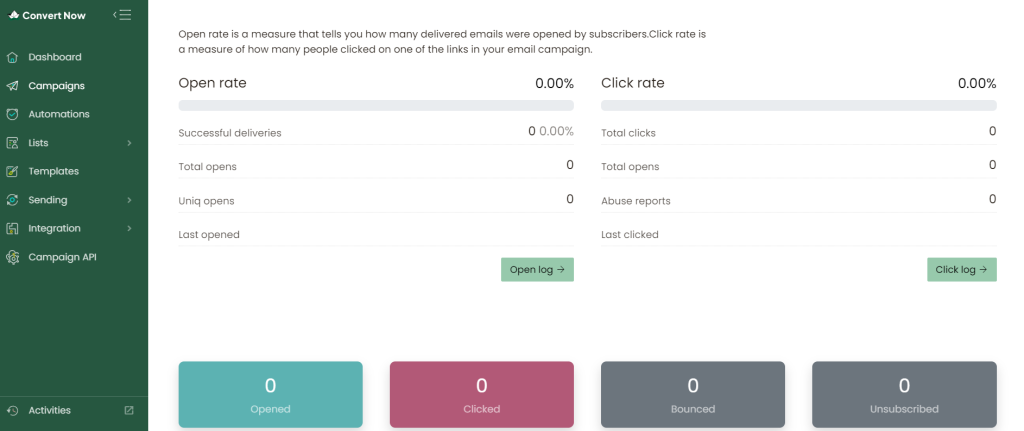
- You get the following stats:
- Open rate
- Click rate
- Unsubscribed contacts
- Bounced contacts
- Contacts that have reported you for any unwanted activity
- Top countries by clicks
- Top countries by opens
- Top locations by opens
- Subscribers with most opens
- and more!
Important tips for sending Canva newsletters:
- Responsive Design: Ensure the newsletter design is mobile-friendly.
- Image Size: Keep the image size reasonable to avoid slow loading times.
- Alt Text: Add alternative text to images for better accessibility.
By following these detailed steps, you have successfully embedded a Canva newsletter in an email and shared it with your audience.
